


Install Ollama, download a local large language model (LLM), and use ollama run to chat from your terminal. You do not need an API key for local models. Ollama also offers cloud models, so installing the app alone does not make every conversation local.[1][7]
The outcome here is a terminal chat running on your computer, not a web-search assistant. Documentation checked Oct 18, 2026. Humanopia has not run this workflow hands-on. Our review methodology explains the distinction between research and testing. No speed or output-quality measurements are claimed here.
Before you start
You need permission to install software, internet access for downloads, and enough storage and working memory for your model. Download size is not the same as runtime memory demand: context length and concurrent requests also affect memory use.[2][4][5]
| Platform | Check before installing |
|---|---|
| Mac | Ollama lists macOS Sonoma v14 or newer. Apple M-series machines support CPU and GPU execution; x86 Macs use CPU execution.[4] |
| Windows | Ollama lists Windows 10 22H2 or newer. It runs natively. Check the Windows documentation for your graphics driver requirements.[5] |
| Linux | Use the official installer or manual instructions. GPU setup depends on your hardware and drivers.[6] |
Platform requirements checked Oct 18, 2026. These are compatibility requirements, not performance guarantees.
The Ollama repository is MIT-licensed, but downloaded models have their own terms. Check the model’s license before work use or redistribution.[3][8]
Local models require no API key; this route does not require a paid cloud plan. Hardware, electricity, storage and internet access still have costs. Access conditions checked Oct 18, 2026.[1]
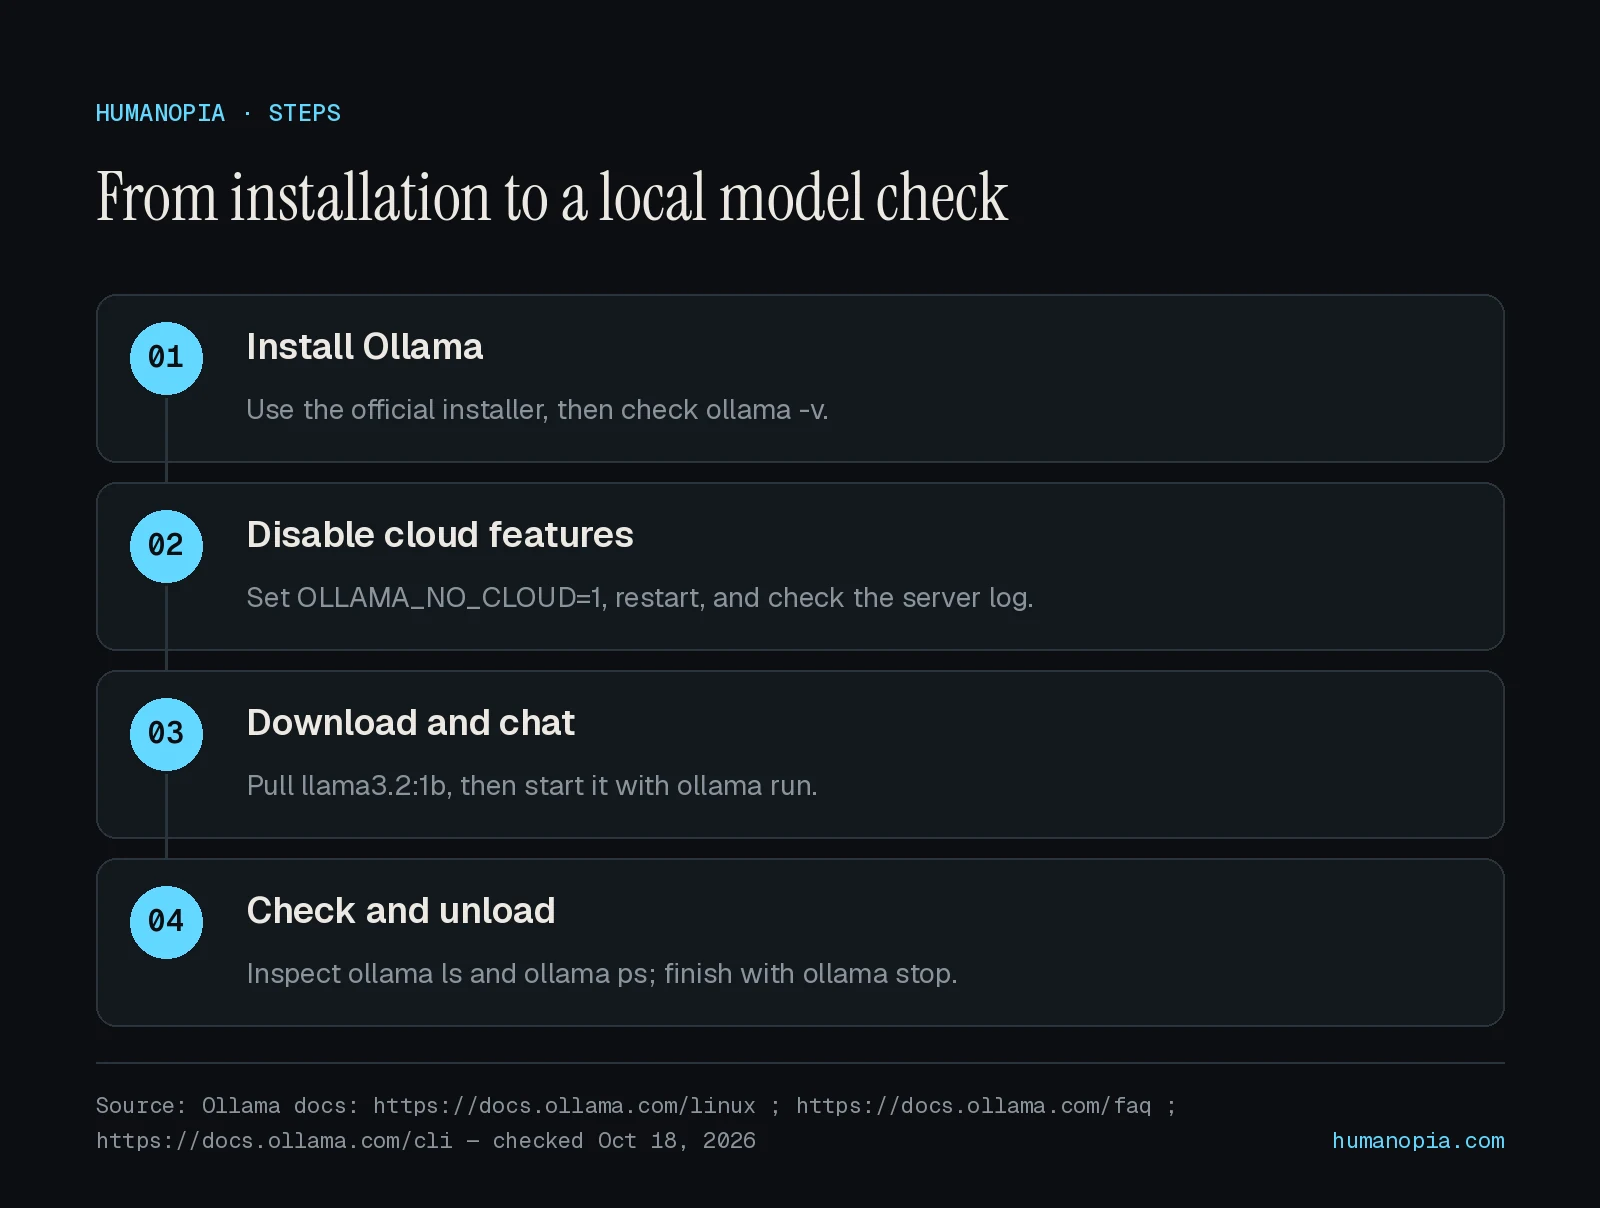
1. Install Ollama
Mac
Use the official download linked in the macOS documentation. Mount the disk image, drag Ollama to Applications, and open it. Allow its command-line setup prompt to follow this terminal guide.[4]
Windows
Use the official OllamaSetup.exe link in the Windows documentation. It installs in your user account without requiring Administrator rights. Ollama runs in the background and makes its command available in PowerShell and Command Prompt. Open a new terminal after installation.[5]
Linux
The official installation command is:[6]
curl -fsSL https://ollama.com/install.sh | sh
This downloads and immediately executes an installer. Use it only if you trust the official source and are authorized to change the machine. If your organization requires reviewing scripts first, follow its process or the manual installation instructions instead.
For a systemd installation, check the service and start it if inactive:[6]
sudo systemctl status ollama
sudo systemctl start ollama
For a manual installation without a service, start the server and leave that terminal open:[6][7]
ollama serve
Do not start another server if the desktop app or service is already running.
Check the installation
Run the documented version check:[6]
ollama -v
Look for version information rather than a command-not-found error. Record your installed version for troubleshooting; this guide follows documentation available on the check date rather than a pinned release.
Screenshot needed (Alex): Terminal showing the actual Ollama version; include OS and capture date in the caption
How: After installing Ollama, open a fresh Terminal or PowerShell window and run ollama -v
2. Disable cloud features for local-only operation
Ollama’s FAQ documents OLLAMA_NO_CLOUD for disabling cloud models and web search. Set it for the server, not just a client terminal, then restart Ollama.[2]
- Mac desktop app: run
launchctl setenv OLLAMA_NO_CLOUD 1, then fully quit and reopen Ollama. - Windows desktop app: quit Ollama from the tray, add a user environment variable named
OLLAMA_NO_CLOUDwith value1, and relaunch Ollama from the Start menu. - Linux systemd service: run
sudo systemctl edit ollama.serviceand add this override, then reload and restart:[2]
[Service]
Environment="OLLAMA_NO_CLOUD=1"
sudo systemctl daemon-reload
sudo systemctl restart ollama
For a manually started Linux server, stop that server and restart it with:[2]
OLLAMA_NO_CLOUD=1 ollama serve
The value 1 enables this setting. Ollama says the restarted server’s logs should show Ollama cloud disabled: true. Configuration checked Oct 18, 2026.[2]
On Mac, inspect ~/.ollama/logs/server.log. On Windows, open %LOCALAPPDATA%\Ollama in File Explorer and inspect server.log. For a Linux systemd service, use journalctl -e -u ollama; a manually started server prints logs in its terminal.[4][5][6]
Screenshot needed (Alex): Restarted server log showing Ollama cloud disabled: true; hide private paths or unrelated log entries
How: After setting OLLAMA_NO_CLOUD and restarting, inspect server.log on Mac or Windows, journalctl -e -u ollama for Linux systemd, or the manual server terminal
This disables Ollama’s cloud features, not internet access for the whole computer. Downloads still require a connection. Use nonsensitive text while confirming the setup.
3. Download a model and start chatting
For a visual walkthrough, watch the installation at 1:53 and terminal commands at 10:49. The video uses different model examples; follow this guide’s llama3.2:1b tag and local-only settings. Its cloud and agent sections are outside this walkthrough.
Use llama3.2:1b for this walkthrough. The official library identifies it as the smaller, 1-billion-parameter option in the Llama 3.2 text-model family; checked Oct 18, 2026. It is a setup example, not a claim that it is the newest or best model for your work.[3]
Download the model explicitly to separate download problems from chat problems:[3][7]
ollama pull llama3.2:1b
Screenshot needed (Alex): Completed download of the exact llama3.2:1b model tag
How: Run ollama pull llama3.2:1b and capture the completed progress and success message
Start the chat:[3]
ollama run llama3.2:1b
Try a nonsensitive prompt:
Rewrite this sentence in plain English: The meeting has been postponed until further notice.
Read the answer critically. A reply confirms generation, not factual accuracy or fitness for your real task. Type /bye to leave the interactive session.[1]
Screenshot needed (Alex): Terminal chat showing llama3.2:1b, the nonsensitive rewrite prompt and its actual response; record capture date
How: Run ollama run llama3.2:1b and enter the example prompt above
4. Check installed and running models
List downloaded models:[7]
ollama ls
While the chat is active, open another terminal and inspect the loaded model:[2][7]
ollama ps
The PROCESSOR column indicates whether the model is loaded on the GPU, CPU or both. CPU execution is not automatically an installation failure; consult the FAQ before treating it as a driver problem.[2]
Unload the model when finished:[7]
ollama stop llama3.2:1b
Stopping unloads the model rather than removing its downloaded files.[2][7]
Screenshot needed (Alex): Downloaded-model list and running-model table with the actual PROCESSOR value; caption hardware, OS, Ollama version and capture date without a benchmark claim
How: Keep the chat active, open another terminal and run ollama ls followed by ollama ps
Keep the server local
Ollama’s default bind address is 127.0.0.1 on port 11434, according to its FAQ, checked Oct 18, 2026. That is the loopback address for access from the same computer.[2]
Leave the default in place. Do not forward the port on your router or add a tunnel just to make terminal chat work. Sharing an inference endpoint is a separate security task.
Ollama says it does not see prompts or data when models run locally. That does not establish what an unrelated interface, extension or cloud connector does with your text. Check each added component before entering confidential information.[2]
Fix common problems
| Symptom | Next check |
|---|---|
| Command not found | Reopen the terminal. On Mac, check CLI setup; on Windows, check the installer added Ollama to your user PATH.[4][5] |
| Client cannot connect | Check the desktop app or Linux service. For a manual install, leave ollama serve running.[5][6][7] |
| Address already in use | Check for an existing desktop app or service before starting another server. |
| Download fails | Confirm the model tag and connection. For managed proxies, follow the FAQ’s HTTPS proxy instructions rather than disabling certificate checks.[2][3] |
| Slow generation or memory exhaustion | Inspect ollama ps, close memory-heavy apps, and avoid increasing context length or concurrent requests while diagnosing. The FAQ explains their memory impact.[2] |
| Poor answers | Try a clearer, narrower task before changing installation settings. A model limitation is different from a failed installation. |
For Linux service logs, Ollama documents journalctl -e -u ollama.[6] If a command differs, compare your installed version with the current CLI reference.[7]
Found an outdated instruction? Send the affected step and supporting source through our contact page. Never include secrets or private prompts in a troubleshooting report.
What to do next
Start with a narrow task: rewrite a paragraph, draft a checklist or summarize text you can safely use. Judge the result before adding integrations or buying hardware.
AI-assisted: AI helped research, draft and edit this guide. Alex has not yet reviewed it hands-on. See our editorial standards and AI policy for how we label AI-assisted work.
Before publication
[TK: Alex to run the installation, local-only configuration and chat checks on his chosen platform; record hardware, OS, Ollama version, date and corrections.]
[TK: Alex to approve the practical recommendation, supply screenshots and update the AI-assistance note to reflect his actual review.]
Source check dates
All sources below were accessed Oct 18, 2026. No explicit publication or last-update date was available in the retrieved documentation, library description or repository overview; these are access dates, not release dates.